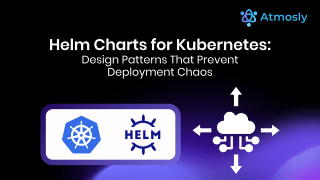
Kubernetes is powerful, but let's be honest, it can also feel like juggling flaming bowling pins while reading instructions written in another language. Even simple apps need multiple YAML files, long configurations, and settings that seem to multiply on their own.
This is exactly where Helm comes in.
If Kubernetes is a giant machine full of tiny switches, Helm is the tool that helps you flip all the right switches with one simple command. It takes messy, repetitive Kubernetes setup work and turns it into something organized, reusable, and beginner-friendly.
But most explanations of Helm are filled with jargon like? templating engines, release management, and chart repositories. Not here.
In this guide, you'll learn Helm in plain English, no buzzwords, no confusion, no over-complication. We'll break down what Helm is, why it exists, how it works, and how to use it with real examples. Even if you've never deployed anything to Kubernetes before, this guide will make everything finally click.
What is Kubernetes, Without the Buzzwords?
Before we talk about Helm, we need to understand what Kubernetes actually does without drowning in technical words.
Imagine you run a busy restaurant kitchen. You don't just cook one dish; you cook many dishes at once. You have multiple cooks, multiple orders, ingredients everywhere, and timing matters. If one cook burns something, another needs to step in. If more customers arrive, you need more cooks. If it's slow, you need fewer.
That's Kubernetes.
Kubernetes is the kitchen manager for your apps. It makes sure:
Your apps are running
They restart if they crash
They scale up when traffic grows
They scale down when things are quiet
They run across multiple machines
They stay healthy
But here's the catch - the recipes Kubernetes needs (the YAML files) are long, repetitive, and very easy to mess up. One small indentation mistake, and suddenly nothing works.
Imagine having to write a 5-page recipe every single time you want to serve the same dish. That's Kubernetes without Helm.
As apps get bigger, YAML files pile up. Soon you're managing 20, 50, or even 200 different Kubernetes configuration files. It becomes too much for any human to track manually.
This is the exact problem Helm solves. It takes all those complicated recipes and bundles them into clean, reusable packages.
What Is Helm?
If Kubernetes is a giant kitchen full of stoves, ingredients, and cooks, then Helm is the cookbook that helps you make dishes without rewriting the recipe every time.
That's the easiest way to understand it.
Helm is a tool that helps you install apps on Kubernetes the same way your phone helps you install apps from the App Store - quickly, cleanly, and without needing to understand every tiny detail happening underneath.
Without Helm:
You write long, detailed Kubernetes YAML files every time you want something deployed.
With Helm:
You run one simple command like:
helm install my-app mychart
And boom - everything gets deployed automatically.
Helm takes care of:
generating all the YAML files
filling in the right values
organizing everything neatly
handling upgrades
handling rollbacks
deploying the app the same way every time
It's like having a kitchen robot that already knows every recipe and prepares dishes exactly the way you like them - without mistakes.
Why Helm Matters for Beginners
Helm removes the scary part of Kubernetes. Instead of juggling dozens of configuration files, you get one organized package called a chart, which contains everything Kubernetes needs.
You don't need to be an expert.
You don't need to memorize YAML.
You don't need to assemble everything by hand.
Helm lets you deploy apps with confidence, even if you're just starting your Kubernetes journey.
Why Helm Exists - The Real Problem It Solves
To understand why Helm is such a big deal, let's look at the actual problems people face when working with Kubernetes. None of these are theoretical; these are real headaches developers run into on day one.
Problem 1: Too Many YAML Files
Deploying even a simple app on Kubernetes can require:
a Deployment YAML
a Service YAML
a ConfigMap
a Secret
an Ingress
maybe a HorizontalPodAutoscaler
That's already 57 files.
For one app.
And every file is long.
Now imagine deploying 10 apps.
Or 50.
Suddenly, your project looks like a drawer full of tangled cables.
Problem 2: Repeating the Same Configuration Everywhere
You might have:
dev environment
staging
production
Each environment needs the same files, but with small changes like replica counts or URLs.
Copy-paste becomes your daily nightmare.
One mistake, and something breaks in production.
Problem 3: Upgrading Apps Is a Pain
Let's say you want to update your app version from 1.0 to 1.1.
Which YAML file do you update?
Where?
Did you miss another file?
Is there a rollback plan?
Kubernetes doesn't help you with this.
Problem 4: Managing Everything by Hand Is Error-Prone
Humans make mistakes.
A missing space in YAML?
A wrong value?
Forgetting to update one file?
Your app won't deploy, and Kubernetes will tell you nothing helpful.
This is why Helm exists.
Helm bundles all these messy YAML files into clean, reusable packages. It lets you install, upgrade, or remove apps with simple commands - and without touching dozens of files manually.
Helm is your Kubernetes organizer, solving problems you don't want to deal with.
Key Helm Concepts (Charts, Templates, Values, Releases) Explained Simply
Now that you know the big picture of how Helm works, let's break down the four concepts you'll see again and again. These are the only terms you truly need to understand Helm. No buzzwords. No confusion.
Charts - The Recipe Book?
A Helm chart is just a folder that contains everything Kubernetes needs to deploy your app.
When you download or create a chart, you're essentially getting a ready-made recipe that tells Helm:
What to deploy
How to deploy it
What parts can be customized
Charts make your Kubernetes world neat and organized, something Atmosly users appreciate because clarity = speed.
Templates - The Fill-in-the-Blanks Instructions
Templates are YAML files with placeholders in them.
For example:
replicas: {{ .Values.replicas }}
Helm fills in these blanks using your values, generating clean Kubernetes YAML automatically.
No more rewriting YAML 20 times.
No clutter. No repetition.
Values - The Settings You Can Change Anytime
Values are the knobs you can turn.
Example in values.yaml:
replicas: 2
image: nginx:latest
Want to scale? Change a number.
Want a new version? Change the tag.
This flexibility is exactly why tools like Atmosly integrate easily with Helm-powered apps.
Releases - The App Running in Kubernetes
Every time you install a chart, you create a release.
Think of it like serving a finished dish from a recipe.
You can upgrade it, roll it back, or remove it without messing with the original chart.
Installing Helm - The Zero-Confusion Guide
Good news: installing Helm is much easier than installing Kubernetes itself. Helm is just a single command-line tool that runs on your laptop, and once it's installed, you can start deploying apps immediately.
Let's keep this as simple as possible.
How to Install Helm on macOS
If you have Homebrew (most developers do), run:
brew install helm
Check your installation:
helm version
If you see a version number, you're good to go.
How to Install Helm on Windows
Using Chocolatey:
choco install kubernetes-helm
Or using Scoop:
scoop install helm
Verify:
helm version
How to Install Helm on Linux
For Debian/Ubuntu:
sudo snap install helm --classic
Or download the official binary:
curl https://raw.githubusercontent.com/helm/helm/main/scripts/get-helm-3 | bash
Verify:
helm version
That's It - Really
Helm doesn't need extra setup or configuration to start working.
No hidden files.
No terrifying cluster setup.
Nothing confusing.
Once Helm is installed, you're ready to create your first chart, deploy apps, and finally escape the never-ending YAML jungle.
Create Your First Helm Chart (With Real Code)
Now it's time for the fun part - creating your very first Helm chart. Don't worry, it's much simpler than people make it sound. Helm will generate most of the structure for you, and you only need to understand a few key files.
Let's walk through this slowly and clearly.
Step 1: Create a New Chart
Run:
helm create mychart
Helm now creates a folder called mychart with everything a Kubernetes app needs.
Your new chart will look like this:
mychart/
Chart.yaml
values.yaml
templates/
deployment.yaml
service.yaml
ingress.yaml
_helpers.tpl
This is your recipe book.
Step 2: Understand the Important Files
Chart.yaml
This file tells Kubernetes basic info about your chart.
Example:
apiVersion: v2
name: mychart
version: 1.0.0
Think of this like the label on a recipe card.
values.yaml
This is where you put the settings that you want to customize.
Example:
replicaCount: 1
image:
repository: nginx
tag: latest
These values get inserted into the actual YAML files automatically.
templates/deployment.yaml
This file contains the Kubernetes Deployment - but with placeholders.
Example snippet:
replicas: {{ .Values.replicaCount }}
image: {{ .Values.image.repository }}:{{ .Values.image.tag }}
Helm fills these in using your values from values.yaml.
templates/service.yaml
This creates a Kubernetes Service to expose your app.
Example:
type: ClusterIP
port: {{ .Values.service.port }}
Again, super simple: Helm fills the blanks.
Step 3: Customize Your Chart (Optional)
Edit values.yaml:
replicaCount: 2
image:
repository: nginx
tag: "1.25"
service:
port: 80
With just these changes, you've updated:
- Your replica count
- Your image version
- Your service port
Without touching any YAML inside templates/.
That's the power of Helm.
Deploy an App Using Helm (Step-by-Step)
You've created your first Helm chart - now it's time to actually deploy it to Kubernetes. This is the moment where everything clicks, because Helm turns a messy pile of YAML into a clean, one-command install.
Let's walk through the full cycle: install, check, upgrade, and uninstall.
Step 1: Install Your App
Inside the folder above your chart, run:
helm install myapp ./mychart
Breakdown in plain English:
- helm install Helm, please deploy this.
- myapp: the name of your release (your running app)
- ./mychart the chart you created
Helm now:
- reads your chart
- fills in all values
- generates Kubernetes YAML
- sends it to Kubernetes
- creates the app
All from one command.
This replaces dozens of kubectl apply -f? commands.
Step 2: Check What's Running
Run:
helm list
You'll see something like:
NAME NAMESPACE REVISION STATUS
myapp default 1 deployed
This tells you your app is live.
You can also see the Kubernetes objects with:
kubectl get all
Your Deployment, Service, ReplicaSet, and Pods should all be there.
Step 3: Upgrade Your App
Let's say you change something in values.yaml, like updating the image tag or increasing replicas.
To apply the change:
helm upgrade myapp ./mychart
Helm compares:
What's running
What's new
Then updates only what's necessary.
This replaces painful manual YAML edits.
Step 4: Roll Back If Something Breaks
If an upgrade goes wrong, you can go back instantly:
helm rollback myapp 1
This undoes mistakes that something plain Kubernetes YAML cannot do easily.
Step 5: Uninstall the App
When you're done experimenting:
helm uninstall myapp
Helm removes everything it created:
pods
deployments
services
configmaps
Clean, tidy, nothing left behind.
You Just Deployed Your First Helm App
With just a few commands, you've:
installed
inspected
upgraded
rolled back
removed
a full Kubernetes application without touching messy YAML.
This is Helm's magic.
Helm vs Plain Kubernetes YAML (No Buzzwords)
Let's compare the two ways beginners deploy apps to Kubernetes:
(1) writing raw YAML by hand
(2) using Helm charts
Both work, but they feel completely different in real life.
Think of this as cooking with individual ingredients versus using a meal kit.
Plain Kubernetes YAML - The Hard Way
When using raw YAML, you must:
- write every file manually
- repeat the same values everywhere
- update five different files when something changes
- make sure spacing and formatting are perfect
- handle upgrades yourself
- remember every part of the deployment
It works, but it's slow and messy.
One small mistake (like a missing space) can make everything break.
Helm - The Easy, Organized Way
Helm bundles everything into a reusable chart.
You just provide the settings you want.
With Helm:
no duplicate YAML
upgrades are one command
rollbacks are one command
everything is versioned
you can reuse the same chart for dev, staging, and prod
values live in ONE place instead of scattered everywhere
Think of it like having a recipe you can reuse forever.
Simple Comparison Table
Feature | Plain YAML | Helm |
Number of files | Many | One chart |
Reusability | Low | High |
Updating apps | Manual edits everywhere | One command |
Rollbacks | Difficult | Built-in |
Environment differences | Hard to manage | Easy with values files |
Human error | Very likely | Much lower |
Plain YAML is great for learning.
But Helm is what teams actually use when apps get bigger.
When You Should Use Helm (and When You Should Not)
Helm is powerful, but it's not something you need to use everywhere. Knowing when to use Helm and when not to will save you a lot of confusion as a beginner.
When You Should Use Helm
Helm is a great choice when:
You deploy the same app multiple times
(dev, staging, production)
Your app needs more than one YAML file
You want easy upgrades and rollbacks
You work in a team, not alone
You want to avoid copy-paste configuration
You plan to manage apps long-term
If you've ever thought,
Why am I editing the same values in five different files?
Helm is for you.
This is also why Helm fits naturally into modern DevOps platforms like Atmosly, where repeatable deployments and visibility matter more than manual setup.
When You Should NOT Use Helm
Helm might be overkill when:
You're just learning basic Kubernetes
You're deploying a very small, one-time app
You want to understand raw YAML deeply
You don't plan to reuse the deployment
For absolute beginners, writing plain YAML once or twice is useful. It helps you understand what Kubernetes is actually doing.
The Simple Rule
Learning Kubernetes basics using plain YAML
Running real apps repeatedly uses Helm
Helm is not about complexity.
It's about removing unnecessary complexity when your apps grow.
Common Beginner Mistakes (and How to Avoid Them)
Helm makes Kubernetes easier, but beginners often trip over a few common mistakes. None of these means you're bad at DevOps? - They're just part of the learning curve. Knowing them early will save you hours of frustration.
Mistake 1: Editing Templates Instead of Values
This is the most common one.
Beginners open files inside the templates/ folder and start hardcoding changes.
That defeats the whole purpose of Helm.
Rule of thumb:
Change values.yaml, not templates.
Templates should stay generic. Values are where customization belongs.
Mistake 2: Forgetting to Update Helm Repositories
If you're installing charts from a public repo and something fails, you may just need:
helm repo update
Outdated repos cause confusion that looks like Helm is broken - when it's not.
Mistake 3: Not Versioning Charts
If you change your chart but forget to update the version in Chart.yaml, tracking changes becomes painful.
Always bump the version when making updates. Your future self will thank you.
Mistake 4: Over-Customizing Too Early
Beginners often add too many values and conditionals too fast.
Start simple. Add complexity only when you need it.
Mistake 5: Treating Helm as Magic
Helm does not replace Kubernetes knowledge.
It organizes Kubernetes - it doesn't hide it.
If something breaks, always check the generated Kubernetes resources using kubectl.
Helm exists for one simple reason: Kubernetes configuration gets messy very fast. When apps grow beyond a single YAML file, managing deployments by hand becomes slow, repetitive, and error-prone. Helm fixes this by organizing everything into reusable, predictable packages.
In this guide, you learned Helm without the noise. You saw what Helm is, why it exists, how charts, templates, values, and releases work together, and how to deploy, upgrade, roll back, and remove apps with just a few commands. Most importantly, you learned when Helm makes sense - and when plain Kubernetes YAML is enough.
The key idea to remember is this:
Kubernetes runs your apps
Helm helps you manage how those apps are deployed
Helm doesn't add complexity; it removes unnecessary effort when your deployments grow.
If you're working with Kubernetes beyond small experiments, Helm quickly becomes one of the most practical tools in your toolbox.
How Atmosly Makes Helm and Kubernetes Easier
Helm helps you organize Kubernetes deployments, but once your apps are live, a new set of problems begins. Things fail, deployments break, environments drift, and figuring out why something went wrong can take hours, especially for beginners.
This is where Atmosly fits in.
Atmosly gives teams a clear, visual way to manage Kubernetes applications deployed with Helm. Instead of digging through logs, YAML files, and dashboards, Atmosly helps you see what's happening, understand failures faster, and deploy with confidence.
With features like AI-powered Kubernetes troubleshooting, visual CI/CD pipelines, environment cloning, and cost visibility, Atmosly removes the guesswork that often comes after a Helm deployment. Whether you're deploying a simple app or managing multiple environments, Atmosly helps you stay in control without adding complexity.
If Helm helps you deploy better, Atmosly helps you operate better.
Sign up for Atmosly and simplify how you deploy, manage, and troubleshoot Kubernetes applications.